3
Building and Organizing the Zotero Library
To start building your library after installing Zotero, begin by browsing the internet or the KU Library catalogue for items of interest. When you find a citation that you would like to download, simply click on the Zotero connector button. The reference will then be downloaded into your library.
Capturing Citations using the Zotero Connector
Zotero is capable of capturing citations from websites, library databases, and many other sources, and in this section, we will use the Google Scholar database to demonstrate how this process works.
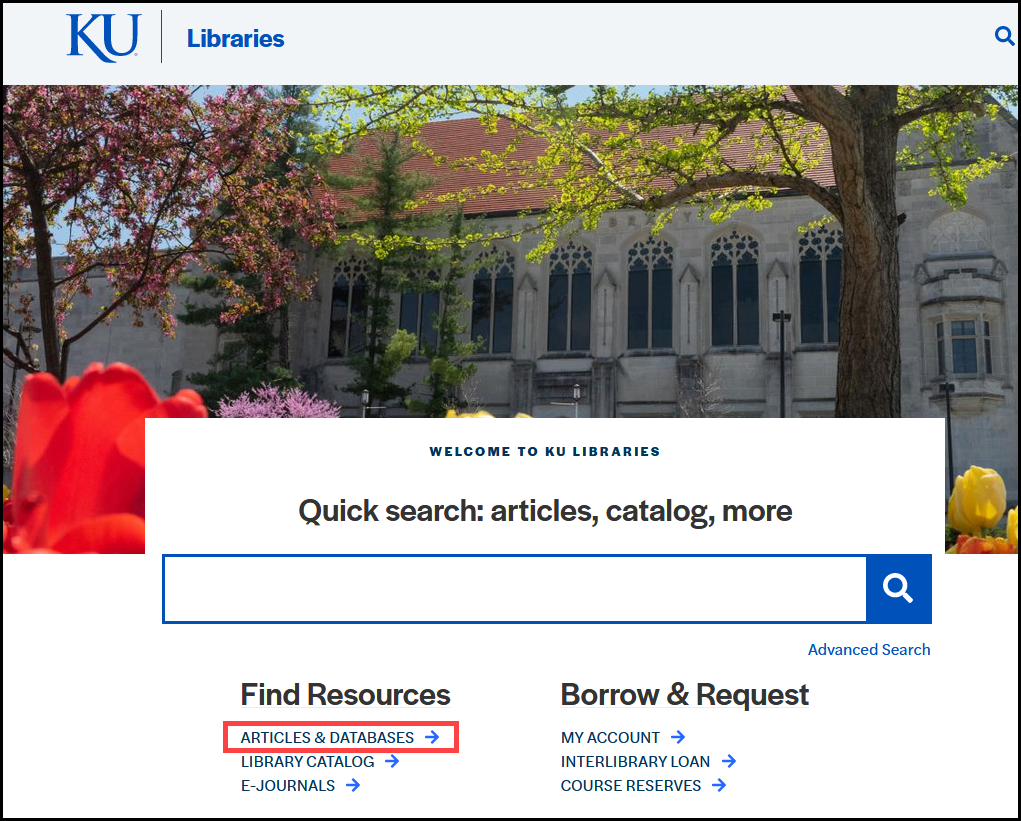
- First, go to the KU Libraries home page (https://lib.ku.edu) and choose the option that reads Articles & Databases underneath the Quick Search bar:
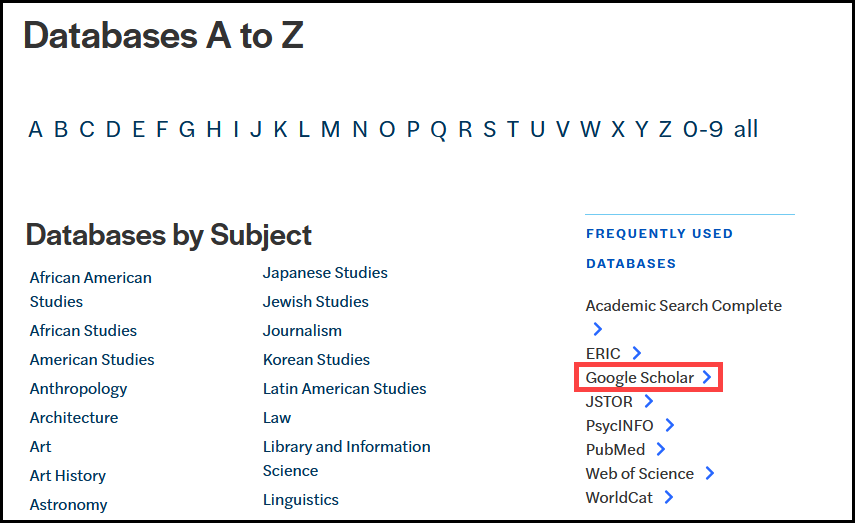
- This will redirect you to a listing of all the databases that KU has access to. Scroll down to the Frequently Used Databases section and click Google Scholar:
- Once redirected to Google Scholar, perform your search. You will then be presented with a listing of citations.
At this point, you have two options: You can capture multiple citations or you can capture them one at a time. Either way, the tool that allows you to easily download citations is the Zotero Connector that we installed earlier, which is located in the upper-right hand corner of the browser window.
Capturing Multiple Sources Simultaneously
To capture multiple references at the same time using the connector button, follow these steps:
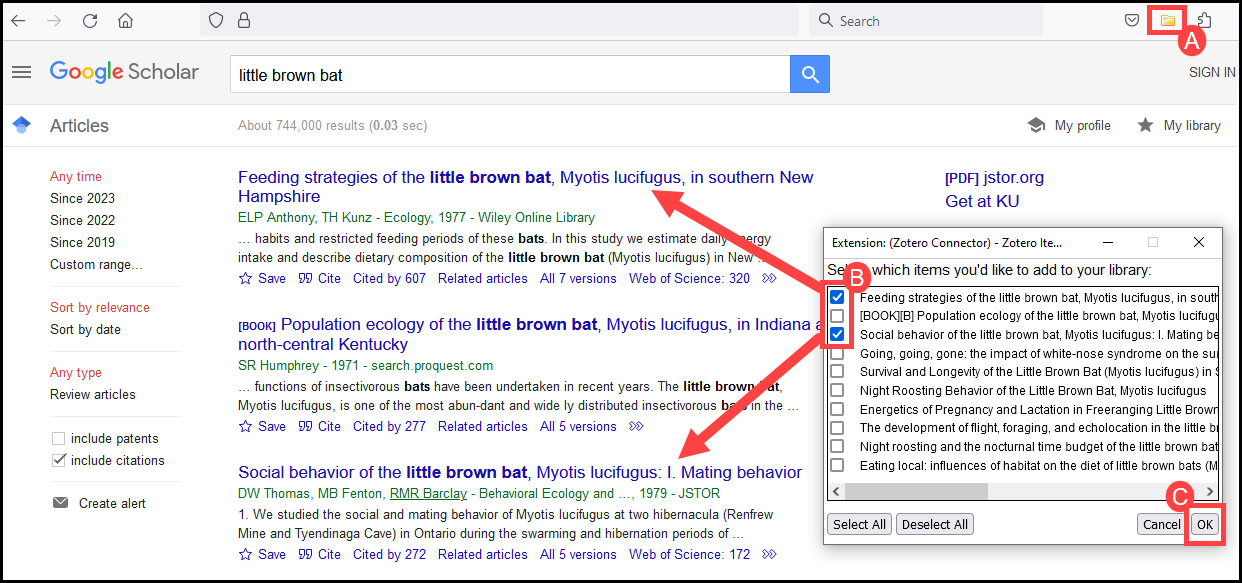
- Perform your search. Then, in the upper left corner of your browser, click on the Zotero connector button (A). Note that if the button appears as a yellow folder, this means that Zotero has detected multiple sources that it can capture.
- After clicking the connector button, the Zotero Item Selector window will open. This window will list the citations from the Google Scholar search in the order they appear on the screen.
- Check the tick boxes next to the references you want to capture (B).
- Click OK (C). The selected references will then be added to your Zotero library.
Capturing Sources Individually
To capture references individually using the connector button, follow these steps:
- Perform your search. Then, click on the hyperlink leading to the reference you want to capture.
- Once on the appropriate page, click on the Zotero connector button in the upper left corner of your browser
- Since you are dealing with a single source, Zotero will not ask you which reference to capture. Instead, it will simply capture whatever reference is “right in front of it,” so to speak.
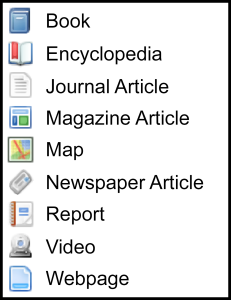
Note that when there is only one reference on a page, the icon for the connector button will change depending on what type of reference you are trying to capture. The icons that Zotero uses are as follows:
Automatically Downloading PDFs
When capturing references using the connector tool, Zotero will often attempt to automatically download full-text PDFs and add them to your Zotero library as attachments. (For the best chance of bringing in a PDF, navigate all the way to the page that contains the “Download PDF” link.)
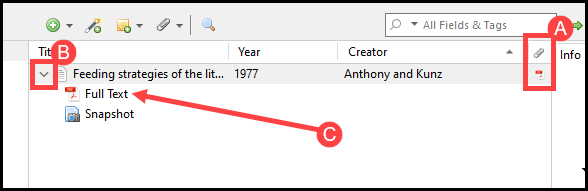
After capturing a reference, you can check to see if Zotero downloaded any associated PDFs by first locating the reference in question within the library. If the item has a small PDF icon in the paper clip column (A), that means the PDF is already attached to the item. You can view this PDF by clicking on the expansion triangle to the left of the citation title (B); this will list all attachments associated with the citation, of which one should be the PDF (C).
If Zotero is struggling to automatically download PDFs, you may need to adjust the Zotero Capture Tool’s proxy settings. To do this:
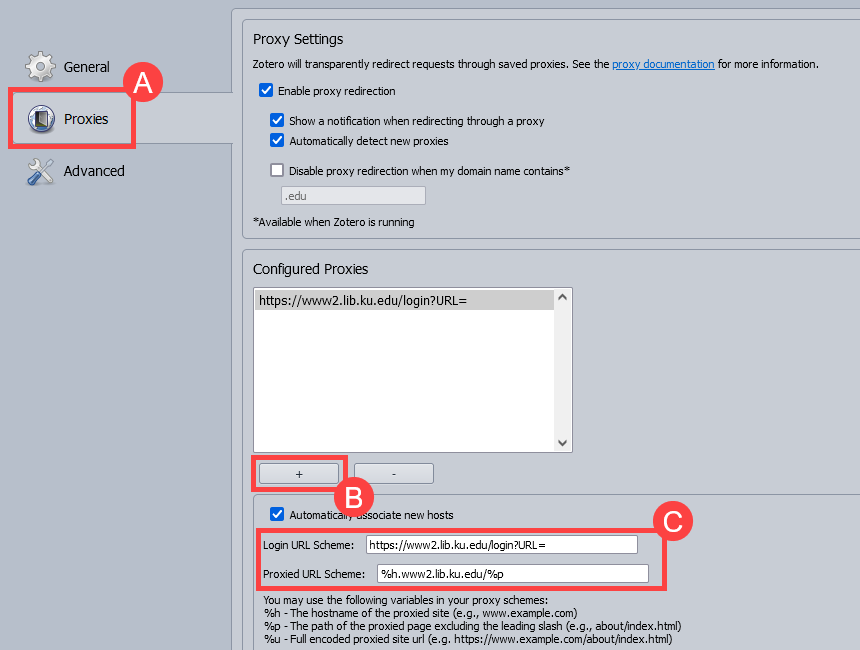
- In your browser, right-click on the Zotero Connector button and choose Preferences (if using Firefox) or Options (if using Chrome). This will open the Connector settings window. On the left, click on Proxies (A).
- Under the Configured Proxies, click the + button (B).
- In the Login URL Scheme box (C), type: https://www2.lib.ku.edu/login?URL=
- In the Proxied URL Scheme box (C), type: %h.www2.lib.ku.edu/%p
Even after adjust these settings, there will be times that Zotero is not be able to download PDFs automatically for you. If this happens, you might need to download the PDF yourself and attach it to a Zotero entry by hand. To do this:
- Download the article from online and save it to your computer.
- Go to your Zotero library. From the middle panel, select the citation you wish to attach the PDF to.
- Right‐click (PC) or control+click (Mac) on the citation. From the list of choices, choose Add Attachment → Attach Stored Copy of File.
- Next, navigate to where you saved the PDF and attach it as you would attach a file to an e‐mail.
Adding an Item by Identifier
As was discussed in the previous section, Zotero has a handy “Add Items by Identifier” tool that allows you to quickly add references to their library by entering in key numerical identifiers. Supported identifiers include International Standard Book Numbers (ISBNs), Digital Object Identifiers (DOIs), PubMed ID (PMIDs), arXIV IDs, and Astrophysics Data System (ADS) Bibcodes. To use this feature:
- Determine the unique identifier associated with the reference you are wanting to import into your library (e.g., its ISBN, DOI, PMID).
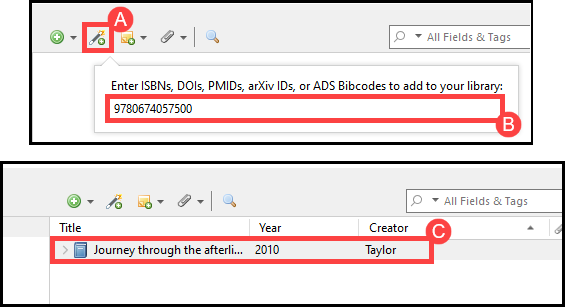
- Once you have located the identifier, click on the Add Item by Identifier icon (A)
- Enter or copy-and-paste the identifier into the text box provided (B) and hit Enter.
- The item should now appear in your library (C):
Adding a Reference Manually
What if you need to include an item in your library for which online citation information is unavailable (e.g., an unpublished manuscript, an interview transcript, a survey instrument, or a unique data set)? Never fear, for you can always manually add a reference to your Zotero library. To do this:
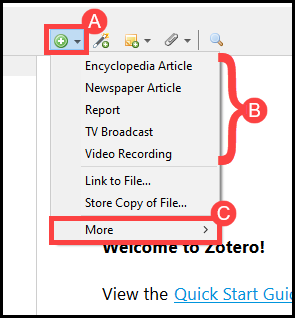
- Click the New Item button (A) from the Zotero toolbar.
- Select the type of reference you want to add (e.g., book, journal article, newspaper) (B). If you do not see the reference type you need, click More (C) for a complete list.
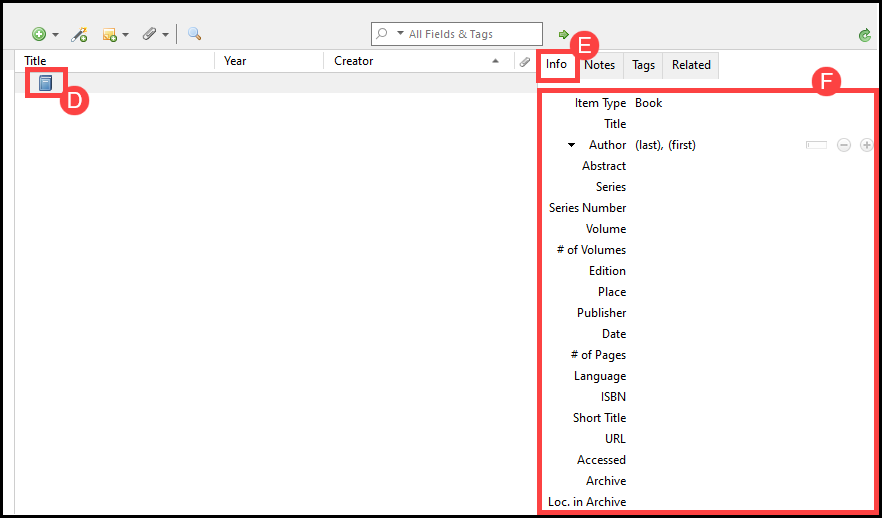
- Zotero will add a blank reference template to your library (D). Click on this blank reference and open up the Info tab (E) on the right.
- In the slots provided, add the required metadata (F). Note that this information will vary depending on the type of reference you are working with.
Building a Library from Previously-Downloaded PDFs
You can also import a single PDF or a group of PDFs into your library, and, if the program can read them, it will convert them into Zotero entries. This does not work for every single PDF you might want to add to your library, but it can still save you some time if you plan on working with a considerable number of PDFs. To build a library from previously-downloaded PDFs:
- From the file explorer, go to the folder where your PDFs are stored.
- Select the PDFs you want to add to your library (A).
- Drag-and-drop the files into the middle panel of your Zotero library (B).
Important: Be careful not to drop the files on top of an entry that is already in your library (doing so will associate the PDFs with that entry, turning them into attachments). Instead, drag the files and drop them only when a thin line appears between library entries (C).

After a beat, the PDF Metadata Retrieval window will open. This window lets you know if Zotero was able to successfully convert a PDF into a Zotero entry (indicated by a green check mark) or if it was not able to convert the PDF (indicated by a red x).
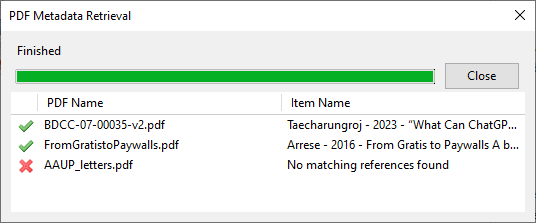
If Zotero is unable to retrieve the metadata for a PDF, it will simply drop the file into your library as-is. Luckily, you can manually convert this PDF into a Zotero entry by right-clicking (PC) or control-clicking (Mac) on it and choosing the Create Parent Item option. This will then attach the PDF to a blank reference template that you can fill out by hand.
Sorting References
You can control which citational attributes the middle panel displays by right-clicking (PC) or control-clicking (Mac) on any of the column headers (A) and choosing the appropriate fields (B):
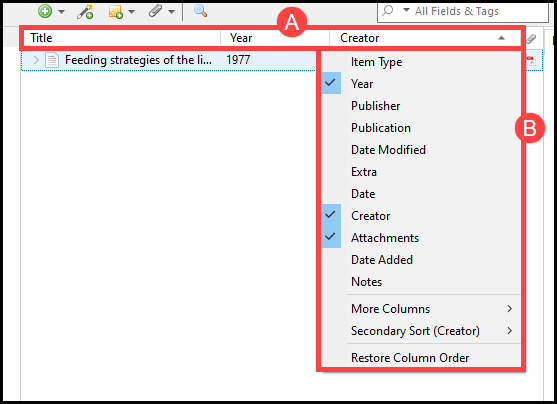
Clicking on the column headers individually will either alphabetically or numerically sort the references in your library, based on which header you selected (for instance, clicking on “Title” will list all of the references in your library alphabetically by title, whereas clicking “Year” will list the references by the year they were published).
Creating Collections
In Zotero, you can create unique folders, called “Collections,” to divide your larger library into smaller subdivisions, thereby making it easier to locate pertinent references. To create a collection:
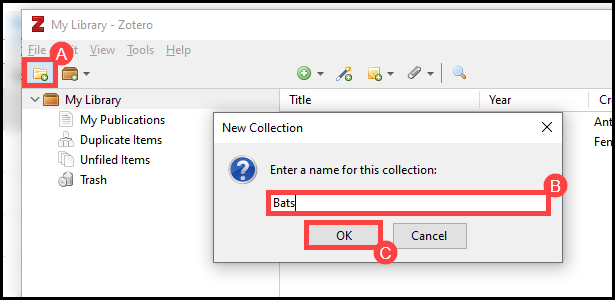
- Click on the New Collection file folder icon (A) in the upper left corner of the Zotero library.
- In the New Collection pop-up box (B), enter a name for the new folder and click OK (C).
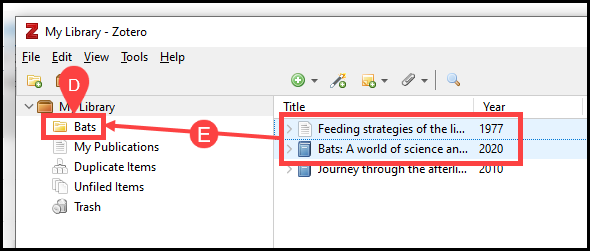
- The new folder will appear in the left panel of your Zotero library (D). From the middle panel of your main library, you can drag-and-drop selected references into the new collection (E).
Note: When you drag-and-drop a reference from your main library into different collections, Zotero does not duplicate that entry; it is instead cross-lists the reference in different locations.
Working with Tags
Zotero allows you to assign keyword tags to references, enabling you to quickly access all associated references in your library with just the click of a mouse. To set up a tagging system:
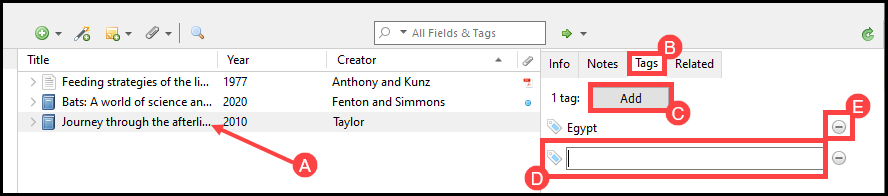
- Select a reference you would like to tag from the middle panel (A).
- In the right-hand panel, choose the Tags tab (B). Then click Add (C).
- Type in a name for your tag in the blank space provided (D). (If the tag is already in the system, it will pop up as you type.)
- If you need to remove a tag from an item, click the minus icon on the right‐hand side of the tag listing (E).
You can see which tags are active in your Zotero library by looking at the tag cloud located at the bottom of the left‐hand panel:
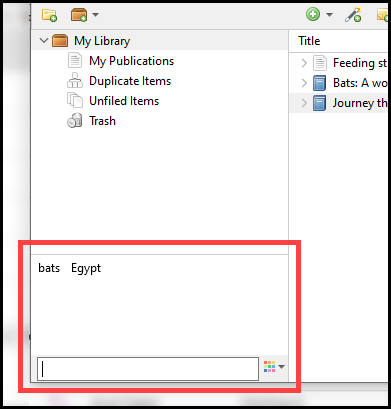
Note: If the tag cloud is not opened by default, locate the small dotted line surrounded by upward-pointing arrows located at the bottom of the panel. Click on this line and the tag cloud will open.
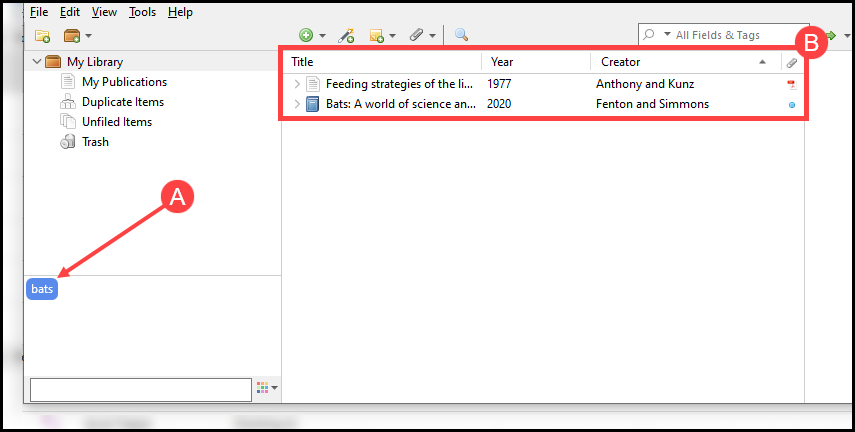
From the tag cloud, you can click on any of the keywords and Zotero will show you all the references in your library that contain that tag (to revert back to a listing of all tags, simply click on the chosen keyword once more to de-select it). For example, consider the following example: A user has selected the “bats” tag from their library’s tag cloud (A). This has resulted in Zotero listing only those entries in their library that have been marked with the “bats” tag (B):
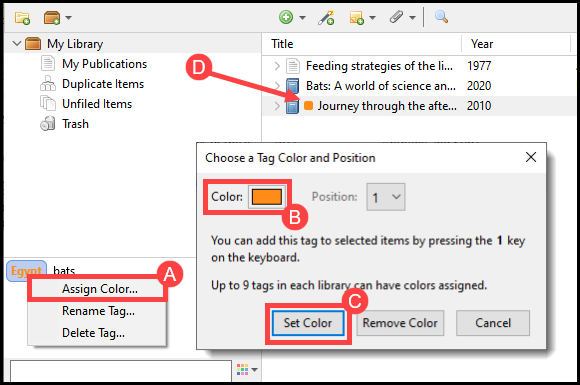
You can also color-code your tags to make organization even easier! To do this:
- Right‐click (PC) or control‐click (Mac) on a tag in the cloud and select Assign Color… (A).
- Chose a color from the Color box (B).
- Click Set Color (C) to save your color preferences.
You will now see a small colored square (D) next to all the citations that have been tagged with the pertinent keyword:
Once a color has been assigned to a tag, you can also assign a “position” to that tag by re‐opening the Assign Color box and selecting a number from the Position box. Assigning a position enables you to click on a reference from the middle panel and then key in the appropriate number; this will automatically add the corresponding tag to the reference in question.
Finally, to delete a tag from the tag cloud, right‐click (PC) or control‐click (Mac) on it and choose Delete Tag…
Managing Duplicate References
Sometimes, in the course of amassing sources, you will discover that you have duplicate copies of a reference in your library. Of course, you can go through your library and weed these out by hand, but luckily, Zotero has a “merge” function that makes removing duplicates substantially easier. To use this tool:
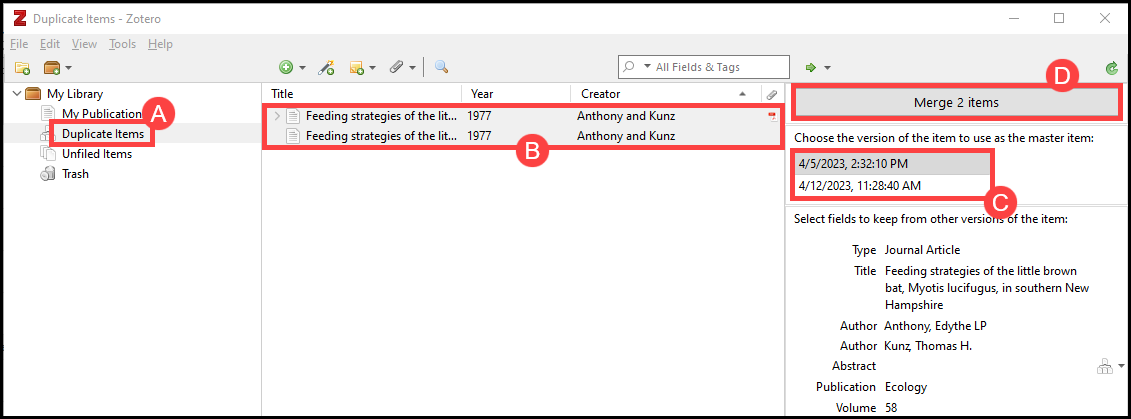
- Click the Duplicate Items (A) link under the My Library folder in your Zotero library. Zotero will then list all the entries in your library that are duplicates of one another in the middle panel.
- Select a reference that you would like to merge; Zotero will then grab all duplicates of that reference (B).
- In the right panel, you will see a drop-down box that lets you toggle between the duplicate entries (C). From here, choose which version you wish to serve as the “master item”. This will be the library entry that Zotero keeps after discarding any duplicates.
- Click Merge (#) items at the top of the right panel (D). Zotero will then collapse down the duplicates into a single library entry.
- Repeat this process for any other duplicate entries in your library.